


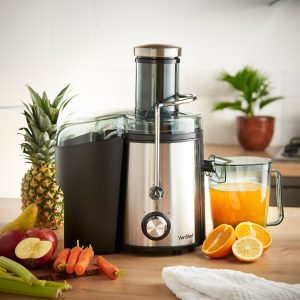
Are you looking for a powerful and efficient juicer to add to your kitchen? Look no further than the Angel Juicer! With its twin gears and high-quality materials, that juicer can easily extract juice from fruits, vegetables, and leafy greens. However, using and cleaning a juicer can sometimes be a hassle. That’s why they’ve put together that step-by-step guide to help you get the most out of your Angel Juicer 8500 and keep it clean and running smoothly. So, let’s get started!
Read The Manual
Before using the Angel Juicer, it is essential to read the manual that comes with it. The manual contains instructions on how to assemble, use, and clean the juicer correctly. It is essential to follow the instructions given to ensure that the juicer functions correctly and to avoid damage to the machine or harm to yourself. Additionally, the manual contains information on how to troubleshoot any issues you may encounter while using the juicer. Take some time to go through the manual carefully and familiarize yourself with the parts and their functions. You can also learn about the type of fruits and vegetables that the Angel Juicer can process and the ones that it cannot. Some fruits like bananas, avocados, and papaya are not suitable for juicing.
By taking the time to read the manual, you will gain a better understanding of how to use the Angel Juicer effectively and safely. Remember to follow all the instructions given in the manual, and you’ll be on your way to making delicious and nutritious juice in no time!
Rinse All Parts With Water
Before you start using the Angel Juicer, it is important to rinse all its parts with water. That ensures that there are no residues from the manufacturing process or any dirt or debris that may have accumulated during storage. It is also a good practice to clean the juicer thoroughly after each use. To rinse the juicer, start by disassembling it into its main parts, which include the twin gears, the juicing screen, the feeding chute, the housing, and the collection container. Then, hold each part under running water and use a soft brush or sponge to remove any remaining debris or stains. Be sure to be thorough when rinsing each part, paying close attention to the gears and the screen, as these areas can easily accumulate residues. Once you are done rinsing, inspect each part to make sure that they are clean and free of debris.
Remember, using a dirty juicer can not only affect the quality and taste of your juice, but it can also affect your health. So, be sure to rinse all parts of the Angel Juicer with water before every use to keep it clean and hygienic.
Assemble Angel Juicer 8500s
Once you have rinsed all the parts of your Angel Juicer 8500s, it is time to start assembling it. The assembly process is pretty straightforward, and it shouldn’t take you more than a few minutes.
- Firstly, attach the motor base to the housing unit. You will hear a click sound when the two parts are correctly fitted. Then, insert the twin gears and locking cap onto the housing unit. It’s important to ensure that the two gears are properly aligned and that the cap is locked into place. Otherwise, your juicer might not function correctly.
- Next, attach the drum cap and feeding chute to the housing unit. The drum cap acts as a cover for the gears and ensures that the juice flows out from the right opening. The feeding chute is where you insert the fruits and vegetables.
- Finally, attach the pulp container and juice collector to the housing unit. Make sure that the containers are placed under the appropriate outlets.
And that’s it! You have successfully assembled your Angel Juicer. Before you start juicing, it’s essential to double-check that all the parts are securely fitted and aligned. Once you are satisfied, you are ready to start creating delicious and nutritious juices!
Prepare Fruits And Vegetables
Before using the Angel Juicer, it is important to prepare your fruits and vegetables. That means washing them thoroughly and cutting them into smaller pieces that will fit into the juicer’s feeding chute. It’s important to note that while the juicer is powerful, it still requires a bit of prep work before it can juice your produce. For leafy greens, like kale or spinach, you will need to tear them into smaller pieces to fit them into the feeding chute. For larger fruits, like apples or pears, you may need to quarter or slice them. And for harder vegetables, like carrots or beets, it may be helpful to grate them before juicing. One tip to keep in mind is to always remove any pits or seeds from your fruits before juicing. These can damage the juicer and cause it to clog. Additionally, it’s important to use fresh produce for the best quality juice. Once your fruits and vegetables are prepared, you’re ready to move on to the next step and start juicing with the Angel Juicer.
Insert Fruits And Vegetables Into The Juicer
Once you have your Angel Juicer assembled and ready to go, it’s time to insert your fruits and vegetables. Here’s how to do it:
- Cut your produce into pieces that will fit through the juicer’s feed chute. The size of the chute on the Angel Juicer is relatively small, so you’ll need to chop your produce into pieces that are no bigger than about 1 inch wide.
- Make sure your produce is clean and free of any dirt or debris.
- Place the produce into the juicer’s feed chute, one piece at a time. You’ll need to use the food pusher that comes with the juicer to push the produce down into the machine.
- Be sure not to overload the juicer with too much produce at once. That can cause the juicer to clog or jam, which can be difficult to fix.
- As the product goes through the juicer, the juice will be separated from the pulp and collected in the juice container. You can pour the juice into a glass or bottle and enjoy it right away.
Remember to take your time when inserting your produce into the Angel Juicer. It’s important to do it correctly to ensure the juicer works effectively and produces high-quality juice.
Turn On Angel 8500s Twin Gear Juicer
Now that you’ve assembled your Angel 8500s Twin Gear Juicer, it’s time to turn it on and start juicing! Plug in the juicer and turn it on by flipping the switch. The machine should start up smoothly and quietly. As you begin feeding your fruits and vegetables through the juicer, make sure to keep a steady pace and not overload the machine. The Angel Juicers twin gear design is highly efficient at extracting juice, but it’s still important to take your time and not rush the process. If you notice any pulp buildup or clogging, don’t panic! Simply turn off the juicer and use the included cleaning brush to remove any excess pulp. Then, reassemble the juicer and start juicing again. With a little practice, you’ll become a pro at using the Angel Juicer and enjoy fresh, nutrient-rich juices every day!
Collect The Juice In A Container
Once you’ve turned on the Angel Juicer and inserted your fruits and vegetables, it’s time to collect the juice in a container. The juicer comes with a juice container, so simply place it under the spout where the juice comes out. You can also use a glass or pitcher if you prefer. Be sure to position the container properly to avoid any spills. If you’re juicing a large amount of produce, you may need to empty the container midway through the juicing process. As the juice flows out of the juicer, you’ll notice that it separates into two parts: the juice and the pulp. The juice will go into the container, while the pulp will be ejected from another spout on the side of the juicer. If you want to extract every last drop of juice from your produce, you can use the included silicone scraper to push any remaining pulp through the juicer. That will ensure that you get the most juice possible from your fruits and vegetables.
Once you’ve collected all the juice you need, turn off the juicer and disassemble it for cleaning. Be sure to enjoy your fresh, nutritious juice right away for the best taste and health benefits!
Disassemble Juicer
Once you have finished juicing, it’s time to disassemble the Angel Juicer for cleaning. Follow these steps:
- Unplug the juicer and turn off the power switch.
- Remove the pulp outlet cover and pulp collection bin from the juicer.
- Unlock and remove the twin gear assembly. Carefully separate the two gears from each other.
- Remove the screens from each side of the gear assembly. Rinse all of the parts with water and use the included brush to remove any remaining pulp or residue.
- Remove the juice cap from the juicer’s body.
- Remove the silicone rings from the juicer body and rinse them with water.
- Take the juicer body apart by removing the two locking screws located on each side of the juicer body.
- Take out the feeding chute and feed the screw. Rinse both with water and use the included brush to clean them.
- Rinse the juicer body and base with water and use the included brush to clean any residue or pulp.
- Dry all of the parts with a towel or air dry them before storing them away.
By following these simple steps, you can easily disassemble and clean your Angel Juicer after each use, ensuring that your juicer stays clean and ready for your next juice-making session.
Dry All Parts With A Towel
Once you have finished using your Angel Juicer, it is important to properly dry all the parts. That will help prevent any moisture from building up and potentially causing damage to the juicer. Using a clean towel, carefully dry each part of the juicer, paying particular attention to any nooks or crannies where moisture can get trapped. Make sure to dry the juicing screen, which is the small mesh piece that fits inside the twin gears, as well as the housing unit and the juice container. Avoid using a paper towel to dry the parts, as that can leave behind small fibers that can get stuck in the juicer and cause damage over time. Instead, opt for a clean, lint-free cloth or towel. Once you have finished drying all the parts, you can reassemble the juicer and store it away until your next use. By properly cleaning and drying your Angel Juicer, you can help ensure that it lasts for years to come and continues to produce fresh, healthy juices every time.
Conclusions
The Angel Juicer-8500 is a powerful and efficient twin-gear juicer that can help you create fresh and healthy juices from a wide range of fruits and vegetables. By following these 10 easy steps, you can learn how to use and clean your juicer effectively and enjoy all the benefits that it has to offer. Remember to always read the manual and follow the manufacturer’s instructions carefully to ensure optimal performance and longevity of your juicer. Additionally, be sure to use only high-quality and fresh ingredients, and always rinse and dry all parts thoroughly after each use to prevent any build-up or contamination. With its powerful motor, durable construction, and advanced twin gear system, the Angel Juicer-8500s is an excellent investment for any home juicing enthusiast or health-conscious individual looking to boost their daily intake of essential nutrients and vitamins. So why not give it a try and start enjoying the delicious and nutritious benefits of fresh juice today?